

How to Travel with Mobility Aids Safely: 2026 Guide
Table of Contents
- Before You Book: Planning and Researching Destination Accessibility
- How to Request Airport Wheelchair Assistance Step by Step
- TSA Screening for Passengers with Disabilities: What Actually Happens
- Flying with a Wheelchair, Scooter, or Walker: Batteries, Cargo Hold, and Priority Baggage
- Traveling with a Wheelchair Checklist: Documents, Spare Parts, and Packing
- Insurance, Damage Claims, and Post-Travel Inspection
- On the Ground: Rental Cars, Public Transit, and Uneven Surfaces
- Charging Abroad, Advocacy, and Emotional Preparation
- Frequently Asked Questions
Last Updated: September 10, 2026
Before You Book: Planning and Researching Destination Accessibility
The most common mistake when learning how to travel with mobility aids safely is booking first and researching accessibility second. That order costs money and independence, so check the destination first.
Ask three questions:
- Sidewalks and curb cuts: Search street-level photos and satellite views. Smooth pavement and ramped corners matter more than a glossy tourism website suggests.
- Transit systems: Look for published accessibility pages. Many major agencies maintain ADA-compliant vehicle and station info, though coverage varies by route.
- Accommodation: Call the property directly. Ask about doorway width, grab bars, elevator dimensions, and whether the accessible room is held for guests who need it.
How to Request Airport Wheelchair Assistance Step by Step
Airport wheelchair assistance is free under federal law, but only works when requested correctly and early: (transportation.gov)
- Request assistance when you book. Add it to your reservation, not at the airport.
- Call the airline 48 to 72 hours before departure. Confirm it appears in your record.
- Arrive 2 to 3 hours early. Assistance queues move slowly at peak times.
- Check in at the counter, not the kiosk. Staff need to see you and tag your equipment.
- Confirm your connection. Ask the agent to note assistance for every leg.
- Get the gate agent's name. If a wheelchair doesn't arrive, that name gets things moving.
What to Say When You Call the Airline
Keep it short and specific. "I'm traveling with a power wheelchair. I need wheelchair assistance to the gate at every airport on my itinerary, and I need to gate-check my chair. Please add this to my record and confirm the battery type is documented."
Ask them to read the confirmation back. If it isn't in the record, it doesn't exist.
TSA Screening for Passengers with Disabilities: What Actually Happens
TSA screening for passengers with disabilities follows a defined process, and knowing it removes most of the anxiety. You won't be asked to stand for long periods if you can't, and you may request a private screening:
- You go through the metal detector or imaging unit if you can. If you can't walk or stand, you're screened at your wheelchair.
- An officer pats down your chair and you. This is routine, not suspicion.
- You can request a private screening area. Ask, and they must accommodate you.
- Your equipment is swabbed for explosives residue. This takes a few minutes.
- You can ask for a supervisor at any point, or ask the officer to explain each step before they do it.
According to TSA's guidance on screening passengers with disabilities, you may bring medically necessary liquids and mobility equipment through security, and you should tell the officer about your device before screening begins.
Flying with a Wheelchair, Scooter, or Walker: Batteries, Cargo Hold, and Priority Baggage
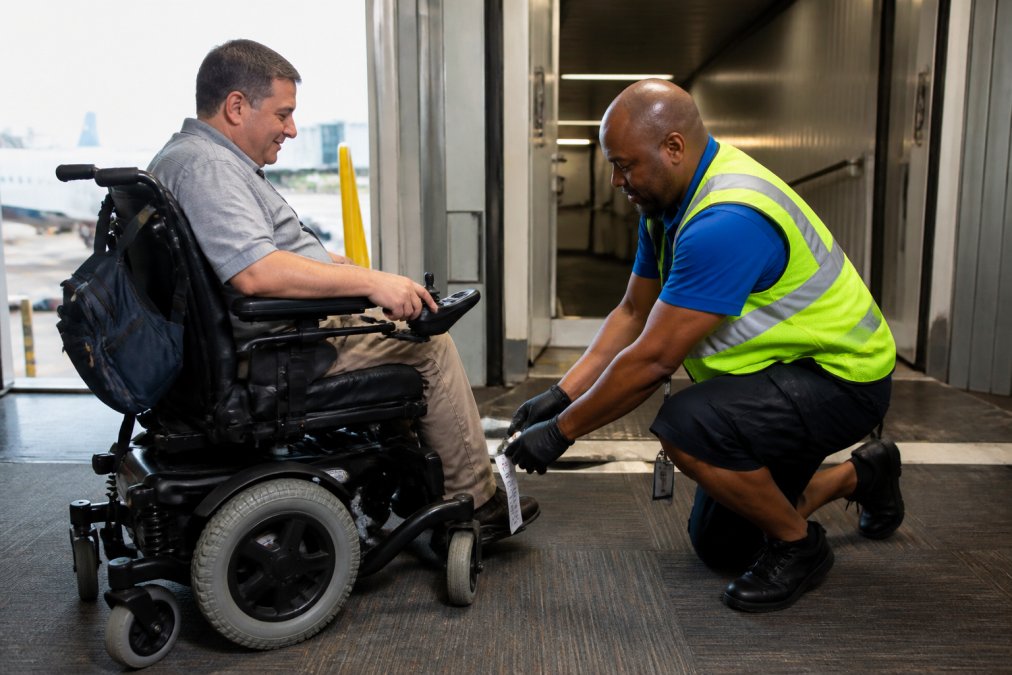
Mobility aids fly as priority baggage, loaded and returned at the gate rather than the carousel. The catch is battery type: lithium-ion and spillable batteries follow different rules.
| Battery Type | Typical Rule | What You Do |
|---|---|---|
| Dry cell / gel | Allowed in the chair | Leave it installed |
| Lithium-ion, small | Allowed with limits | Confirm watt-hours with airline |
| Lithium-ion, large | Often restricted | Ask about removal and carry-on |
| Spillable | Requires prep | Request a battery box from the airline |
Remove and carry on anything detachable: joystick, cushion, footrests, keys. Label every removable part with your name and phone number. A common mistake is leaving the cushion on the chair, where it can vanish into the hold.
For a walker or rollator, fold it and gate-check it with a tag. It usually returns on the jet bridge.
Traveling with a Wheelchair Checklist: Documents, Spare Parts, and Packing
A traveling with a wheelchair checklist is the single most useful document you'll carry. Build it once, laminate it, and reuse it every trip.
- Airline confirmation showing assistance and battery type
- Written equipment description with make, model, and serial number
- Photos of your chair from every angle, taken before departure
- Spare charger and a universal adapter
- Allen wrench set matching your chair's fasteners
- Spare inner tube or solid tire patch kit
- Zip ties, duct tape, and a small multi-tool
- Medications in original labeled containers
- Insurance policy number and claims phone line
The Repair and Maintenance Kit Nobody Talks About
Most guides stop at packing. Nobody tells you what to do when a caster seizes in a hotel lobby. Carry a compact kit: Allen keys that fit your chair, a spare caster wheel if it's small, cable ties, and a tire pump for pneumatic tires. Learn one repair before you leave, usually a wheel swap or brake adjustment. Ten minutes of practice at home beats an hour of panic abroad.
For footwear that holds up through long transit days, arch support and a wide toe box reduce fatigue significantly. Journey Must Haves carries nothing here supportive walking sneakers designed for exactly this kind of sustained standing and walking.

Insurance, Damage Claims, and Post-Travel Inspection
Equipment damage is the fear that keeps people home, and it's reasonable. The defense is documentation and the right policy.
Before you fly, photograph your chair from multiple angles and note every existing scratch. At the gate, watch the tag go on and confirm the destination airport code. After landing, inspect the chair before leaving the jet bridge, and report any damage before leaving the airport, claims filed there move faster than claims filed from home.
Standard travel insurance often excludes mobility equipment or caps the payout below replacement cost. Ask whether your policy covers assistive devices, and consider a separate equipment policy if it doesn't.
Once home, run a post-travel inspection: tires, brakes, caster alignment, battery charge behavior, and every fastener. Catching a bent axle now costs far less than catching it mid-trip next time.
On the Ground: Rental Cars, Public Transit, and Uneven Surfaces
Ground transportation is where most mobility-aid trips go sideways. The fix: convert vague promises into verifiable specifics before you leave home.
Rental Cars: What to Confirm in Writing
Rental agencies rarely guarantee a specific accessible vehicle, and the accessible fleet is small. Confirm the exact model and features in writing before you arrive, and ask:
- Hand controls: Mechanical or electronic? Electronic controls need a power source and specific install, and not every location stocks them.
- Transfer seat: Six-way transfer seat, or only a swivel? A swivel alone doesn't get you behind the wheel.
- Ramp or lift: What's the usable ramp width and weight capacity? A folding ramp and a powered lift aren't interchangeable for a power chair.
- Ground clearance and door height: Ask for the numbers, not the model name. Door height and ramp angle decide whether your chair fits.
A common pattern: the reservation agent confirms accessibility, but the counter agent has never seen the vehicle. Ask for a confirmation number for the accessible equipment itself, separate from the car reservation, and call the pickup location 24 hours ahead to confirm the vehicle is on site.
Public Transit: Verify the Route, Not Just the System
Major systems publish accessibility info, but a system-level page won't tell you whether your station's elevator is working today. Build your plan around three checks:
- Station-level elevator status. Many agencies publish real-time elevator and escalator outage pages. Check the morning of travel, not the week before.
- Vehicle type by route. A route can run low-floor and high-floor vehicles depending on time of day. Ask which runs your departure.
- Gap and ramp policy. Some systems require the operator to deploy a bridge plate on request. Know the phrase your local system uses so you can ask directly.
Build a backup plan for every transit leg and budget extra time. If a station elevator is out, the accessible alternative is often a different station several blocks away, not a bus stop at the same corner.
Uneven Surfaces: The Quiet Hazard
Cobblestones, broken pavement, and steep curb ramps strain you and your equipment. Three mechanisms matter more than the surface:
- Caster size and type. Small hard casters catch on cracks and expansion joints. Larger pneumatic casters roll over them but need more push and maintenance.
- Curb ramp slope. A ramp that meets the letter of the standard can still be too steep to climb under your own power, especially when wet.
- Threshold height. A single step of an inch or two is the most common barrier between you and a restaurant, shop, or hotel room. A portable ramp handles single steps and thresholds and folds flat enough for a backpack.
When Something Breaks on the Road
A seized caster, flat pneumatic tire, or dead charger mid-trip doesn't have to end the journey if you prepared for it.
- Carry the fasteners your chair actually uses. A compact Allen key set matching your chair's bolts handles most field repairs.
- Know one repair cold. A wheel swap or brake adjustment is the highest-value skill to practice at home. Ten minutes of practice beats an hour of panic.
- Find the local repair network before you need it. Search for mobility equipment dealers and medical supply stores near your destination, and save the addresses. A bicycle shop can often handle a pneumatic tire and tube even if it has never seen a power chair.
- Document the failure. Photograph the broken part, note the time and location, and keep the receipt for any replacement part. This feeds the damage-claim process.
Charging Abroad, Advocacy, and Emotional Preparation
This section covers three things most guides skip: the electrical math behind charging a power chair abroad, the words that work when staff are untrained, and the mental preparation that keeps a hard day from ruining a trip.
Charging: Read the Label Before You Pack the Adapter
Charging a power chair away from home means matching voltage, frequency, and plug shape. Getting it wrong can damage a charger that costs more than the trip's meals, so start with the label on your charger, not a guess. Look for the input rating on the charger brick, something like "Input: 100-240V, 50/60 Hz." That range tells you what the charger accepts:
- Wide-range input (100-240V): The charger handles local voltage on its own. You need only a plug adapter, which changes the plug shape, not the electricity.
- Narrow input (for example, 120V only): The charger expects a single voltage. You need a step-up or step-down converter sized to the charger's wattage, not just a plug adapter.
- Frequency (50/60 Hz): Most modern chargers accept both. Older units may not, and a mismatch can cause the charger to run hot or fail.
A voltage converter and a plug adapter are not the same device, and swapping one for the other is the most common and expensive mistake. Size the converter above the charger's rated wattage with headroom, and check it's rated for continuous use, since a chair charger runs for hours.
Buy the adapter and any converter before you leave, not at the airport, where selection is thin and prices are high. Pack the charger in your carry-on so a lost bag doesn't strand your chair.
Advocacy: The Scripts That Work
Advocacy is a learnable skill. You may ask for what you need, ask again if the first answer is no, and ask for a supervisor. Being polite and specific works better than being loud, and having the words ready removes the hesitation of being put on the spot. A few patterns that work:
- State the need, not the problem. "I need wheelchair assistance to the gate" gets action. "This is really hard for me" invites sympathy but not a wheelchair.
- Name the service. Assistance to the gate, a private screening area, and gate-checked equipment are defined services. Using the exact term signals you know what you're entitled to.
- Ask for the supervisor by role, not by complaint. "I'd like to speak with a supervisor" is a neutral request that works whether the front-line answer was wrong or incomplete.
- Get a name and a time. "Can I get your name and the time you noted this?" turns a verbal promise into something you can reference later.
- Escalate in writing when a phone call stalls. A short email with your confirmation number, the date, and the specific failure creates a record phone calls do not.
If a staff member is untrained, assume the system failed rather than the person, and ask for whoever can fix the system. That framing keeps the interaction cooperative and gets you to someone with authority faster.
Emotional Preparation
Travel with a mobility aid takes more energy and planning, and some days will go sideways. Build slack into your schedule so a delayed flight or broken elevator doesn't cascade into a missed connection. Bring a comfort item that makes unfamiliar hotel rooms feel less foreign, and a supportive travel cushion or seat pad makes long waits and hard terminal benches far more bearable.
The travelers who handle this best aren't the ones with the fewest challenges. They planned for the ones they could predict, prepared words and spare parts for the ones they couldn't, and stayed flexible about the rest.
Frequently Asked Questions
How do I protect my mobility aid during air travel?
Remove loose parts like armrests, footrests, and cushions, and carry them with you in the cabin. Label every detachable piece with your name and contact info. Take dated photos of your wheelchair or scooter before the flight, including the serial number and any existing scratches. Ask the gate agent for a gate-check tag and confirm the device will be returned at the aircraft door rather than the baggage carousel. A padded bag or cover adds another layer of protection against scrapes in the cargo hold.
Are airlines required to transport mobility aids for free?
Yes. Under the Air Carrier Access Act, airlines must carry mobility aids and assistive devices at no extra charge, and they do not count toward your baggage allowance. This applies to wheelchairs, scooters, walkers, canes, and CPAP-style medical equipment. If an agent tries to charge you, ask for a Complaint Resolution Official (CRO) at the airport. Keep your receipt for any fees you paid anyway so you can request a refund later.
What should I do if my mobility aid is damaged by an airline?
Report the damage in person before leaving the airport and ask for a written damage report from the airline. Under the Air Carrier Access Act, airlines must repair, replace, or reimburse you for a damaged mobility aid. Keep your photos, receipts, and the report. If the airline refuses, file a complaint with the U.S. Department of Transportation within 45 days. Many travelers also carry travel insurance that covers equipment damage as a backup.
Should I bring a repair kit for my mobility aid?
Yes, a small repair kit prevents small problems from ruining a trip. Pack hex keys that match your chair's bolts, spare inner tubes or a patch kit, a compact tire pump, zip ties, duct tape, and spare battery fuses. For power chairs, bring the charger, the manual, and the manufacturer's contact number. If you use a scooter, add a spare key and a small multi-tool. Most kits fit in a pouch that attaches to the frame or slides into a carry-on.
Traveling with mobility aids safely comes down to preparation most people skip: confirming assistance in writing, documenting your equipment, and carrying a repair kit nobody mentions. Journey Must Haves curates travel essentials built for exactly these gaps, from supportive footwear and orthopedic insoles to comfort gear that makes long transit days easier on your body. Explore Our Collections and pack for the trip you've been putting off.