

How to Pack for Accessible Travel: 2026 Guide
Table of Contents
- What You'll Need Before You Start Packing
- Step 1: Build Your Accessible Travel Packing List
- Step 2: Traveling with Mobility Aids
- Step 3: How to Request Airport Wheelchair Assistance
- Step 4: TSA Guidelines for Medical Devices
- Step 5: Packing for Comfort, Weather, and Weight Distribution
- Common Mistakes to Avoid When Packing for Accessible Travel
- Frequently Asked Questions
Last Updated: September 29, 2026
What You'll Need Before You Start Packing
Packing for accessible travel starts with a plan, not a suitcase. Before you put a single item in a bag, gather your documents, confirm your equipment logistics, and decide how you'll move through the airport. Getting this right is what separates a calm trip from a chaotic one.
The essentials to line up first:
- A folder for travel documents and medical paperwork
- A current list of your medications and dosages
- Contact details for your equipment supplier or repair service
- A confirmed plan for airport assistance
Step 1: Build Your Accessible Travel Packing List
An accessible travel packing list is organized around what you need to function, not just what you need to wear. Build it in two layers: the medical and documentation layer, then the comfort and mobility layer.
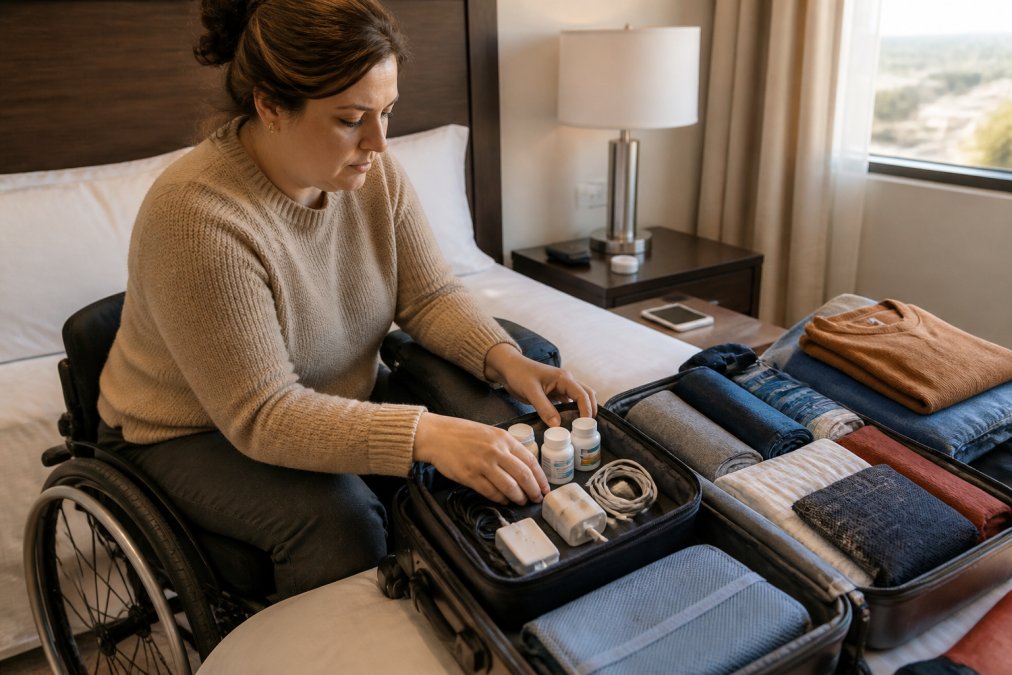
Documents, Medications, and Medical Supplies
Carry all medication in your personal item, never in checked luggage. Pack more than you need for the trip length, and keep a written list of every prescription with its generic name and dosage.
Include:
- A printed medication list, plus a digital copy
- Doctor's contact information and any relevant letters
- Insurance cards and a copy of your itinerary
- Backup supply of any disposable medical items you rely on
Comfort and Mobility Gear
Comfort items do more than feel nice. A supportive cushion, a lightweight blanket, and easy-grip handles reduce fatigue on long travel days. If you're traveling with a young child as well, a portable sleep setup like the Children's Inflatable Travel Bed folds into a carry bag and gives a toddler a real sleep surface, which keeps the whole group's schedule intact.

Step 2: Traveling with Mobility Aids
Traveling with mobility aids requires you to decide in advance what gets checked and what stays with you. The general rule: keep anything you cannot function without in the cabin if it fits and is permitted. But the real work is in the details most packing guides skip.
Decide What Stays With You
Manual wheelchairs, walkers, and rollators can often be gate-checked, meaning you use them to the aircraft door and retrieve them on arrival. Power chairs and scooters usually must be checked, and they are handled differently depending on the battery type. Before you fly, confirm with the airline whether your device travels as a checked item, a gate-checked item, or a stowed item in the cabin.
Keep these with you in the cabin whenever possible:
- Removable cushions, back supports, and seat pads
- Armrests, footrests, and any detachable bags or pouches
- Joystick controllers, keys, and charging cables for power devices
- Any tool you need to reassemble your aid on arrival
Batteries and Power Devices
Battery type drives the rules. Most airlines distinguish between spillable wet-cell batteries, non-spillable gel or sealed batteries, and lithium-ion batteries. Lithium batteries are commonly subject to watt-hour limits and may need to be removed and carried in the cabin. Wet-cell batteries are often required to be removed, packaged to prevent leakage, and sometimes shipped separately. Because these rules change and vary by carrier, confirm the current requirements with your airline and review the federal rules for traveling with batteries before your trip.
Protect Custom Equipment
If your chair has custom measurements, a custom seat, or a power tilt system, treat it like the expensive medical device it is. Photograph every angle before you hand it over, and note the serial number. Ask for a gate-check tag if you are parting with it at the door. A common pattern is for damage to go unnoticed until arrival, so inspect the aid immediately after you retrieve it and report any issue before you leave the airport.
Packing Around Your Aid
Your aid changes how you carry everything else. If you use a wheelchair, a backpack that hangs on the back of the chair keeps your hands free and your center of gravity stable. If you use a cane or walker, a crossbody bag keeps weight close to your body and leaves one hand free for balance. Avoid single-shoulder bags that pull you to one side.
Step 3: How to Request Airport Wheelchair Assistance
You can request airport wheelchair assistance when you book your ticket, and you should confirm it again 48 to 72 hours before departure. Airlines and airports handle this through their own accessibility desks, and the request is typically free.
To request it:
- Add the assistance request when you book, or call the airline's accessibility line afterward.
- Confirm the request again a few days before your flight.
- Arrive early so staff have time to assist you through check-in and security.
- Ask at the gate how boarding will work and whether your aid travels in the cabin or the hold.
Step 4: TSA Guidelines for Medical Devices
Medical devices and supplies are screened differently from ordinary carry-on items, but the process depends on what you are carrying and how you pack it. The single most useful habit is to tell the screening officer what you have before it goes through the machine. You are not required to wait for them to ask.
Children's Inflatable Travel Bed – Car →
Screening Pathways You Can Request
You have options beyond the standard walk-through metal detector or body scanner:
- A pat-down instead of walking through a scanner
- Screening in a private area rather than at the main checkpoint
- A visual inspection of a device instead of X-ray, in some cases
- A companion or caregiver to accompany you through screening
Ask for these at the start of the checkpoint, not after your items are already on the belt. Officers can accommodate medical devices and mobility aids, but only if they know what is coming.
Declaring Medications and Liquids
Medically necessary liquids are handled differently from standard liquids. Declare them clearly and separate them from your other liquids so they can be screened without delaying the rest of your bag. Keep medication in its original labeled packaging when you can, and carry a printed medication list with generic names and dosages. A common pattern is for travelers to pack medication deep in a bag and then have to unpack the whole thing at the checkpoint, keep it in an outer pocket you can reach quickly.
Packing So Screening Goes Smoothly
How you pack determines how fast you move through security:
- Put medical devices and supplies in a bag you can open and repack without removing everything else
- Keep chargers and cables for medical devices together in one pouch
- Label your equipment with your name and contact number
- Carry documentation for implanted devices or specialized equipment if you have it
Before You Fly
Screening procedures and equipment rules are updated periodically, and they can vary by airport. Review the current TSA guidance for medical devices and the federal rules for traveling with batteries before your trip, and confirm any device-specific questions with your airline. If you use a power mobility device, ask the airline in advance how the battery will be handled, since that is the item most likely to cause a delay at the checkpoint.
You are allowed to ask questions and request alternatives during screening. Officers can accommodate medical devices and mobility aids, but only if you tell them what you are carrying, and packing those items where you can reach them quickly is what keeps the line moving.
Step 5: Packing for Comfort, Weather, and Weight Distribution
Weight distribution for balance matters more than most travelers realize. A bag that pulls to one side changes how you steady yourself, especially if you use a cane, walker, or chair.
Comfort items worth the space:
- An inflatable pillow and eye mask for rest during long waits
- Earplugs for noisy terminals and shared rooms
- A lightweight, packable rain shell
Common Mistakes to Avoid When Packing for Accessible Travel
The most frequent error is treating accessibility gear as an afterthought, packed last and buried at the bottom. Pack it first, and keep it accessible during transit.
Other mistakes worth avoiding:
- Checking essential medication or device chargers
- Failing to confirm assistance requests before travel day
- Overpacking, which makes bags harder to manage and balance
- Skipping the equipment photos and serial numbers
A simple summary of what to fix:
| Mistake | Fix | Why It Matters |
|---|---|---|
| Gear packed last | Pack accessibility items first | Keeps essentials reachable |
| Meds in checked bag | Move to personal item | Avoids loss if bag is delayed |
| No assistance confirmation | Reconfirm before departure | Prevents day-of delays |
| Unbalanced bag | Pack heavy items low and center | Protects your stability |
Frequently Asked Questions
What should be included in an accessible travel emergency kit?
Pack a small emergency kit with extra medication (at least a 3-day supply), a printed medication list, copies of prescriptions, emergency contacts, a small first-aid pouch, backup batteries for hearing aids or other devices, and a lightweight backup mobility aid if space allows. Keep this kit in your personal item so it stays with you at all times. Include a card explaining your medical needs in case you cannot communicate them yourself.
How do I organize medical supplies for air travel?
Keep all medications and medical supplies in your carry-on, never checked luggage. Use clear, labeled pouches so security officers can quickly see what you're carrying. Bring medications in original labeled containers and pack a printed list of your prescriptions. For liquid medications over 3.4 ounces, declare them at the security checkpoint. If you use syringes or other sharp supplies, pack them with your medications and inform the TSA officer before screening begins.
What are the best practices for traveling with a disability?
Request wheelchair assistance when you book your flight, and confirm it again 48 hours before departure. Arrive at the airport early to allow extra time for security and boarding. Pack a carry-on with all essentials, including medications, chargers, and comfort items. Label your mobility aid with your name and contact information. Research your destination's accessibility in advance, and carry a printed list of emergency contacts and medical information.
How can I pack mobility aids safely for transit?
If your mobility aid can be disassembled, pack removable parts in a padded bag and label everything clearly. For wheelchairs, remove any loose cushions or accessories and carry them with you if possible. Use a sturdy travel bag designed for your aid, and consider adding a luggage tag with your contact details. For canes or walkers, fold them if possible and store them in a protective sleeve. Always check with your airline for specific rules about mobility aid storage.