

Best Wheelchair Accessories for Travel 2026
Table of Contents
- Quick Comparison: Top Wheelchair Accessories for Travel
- TSA Wheelchair Travel Guidelines: What You Need to Know
- How to Pack a Wheelchair for Flying
- Wheelchair Seat Cushions for Long Travel
- Storage, Comfort, and Mobility Upgrades That Matter
- Installation Difficulty and Universal vs. Proprietary Compatibility
- Conclusion
- Frequently Asked Questions
Last Updated: September 11, 2026
Quick Comparison: Top Wheelchair Accessories for Travel
The best wheelchair accessories for travel 2026 solve three problems at once: they keep your chair intact through baggage handling, they keep you comfortable through long airport days, and they install without tools you won't have at 30,000 feet. This guide from Journey Must Haves breaks down what actually earns space in your carry-on, starting with a side-by-side look at the categories that matter most.
Here's the reality most packing lists skip: airlines handle mobility equipment under a specific set of rules, and the accessories that survive that system are the ones built for it. Below, we'll show you exactly which upgrades hold up in transit, which ones are dead weight, and how to tell the difference before you buy.
Quick Picks:
- Best for Long Flights: Memory foam seat cushion with breathable mesh cover
- Best for Airport Navigation: Removable, snap-on wheel and tote solutions
- Best for Bathroom Stops Mid-Journey: Suction-mounted grab rail for hotel and airport restrooms
- Best for Foot Comfort: Wide-width footwear with arch support for swollen feet
TSA Wheelchair Travel Guidelines: What You Need to Know
TSA wheelchair travel guidelines treat your chair as assistive equipment, not standard luggage, which changes how it moves through security. According to the TSA guidance on traveling with disabilities and medical conditions, you can request a private screening and you do not have to remove your chair's components for a standard X-ray if you prefer a pat-down instead. That part is well known. What most guides skip is the second layer of rules that actually derails trips: airline battery policy and accessory size limits.

The lithium battery rule that catches travelers off guard. If you use a power chair, the battery is regulated as a hazardous material, and the airline, not TSA, sets the acceptance rules (faa.gov). Most carriers require advance notice, a battery type and watt-hour declaration, and in some cases a specific terminal drop-off. The practical move is to call the airline's accessibility desk at least 48 hours before departure, get the confirmation in writing, and carry it with your travel documents (transportation.gov). Do not assume a gate agent can approve an undeclared battery on the spot; a common pattern is that they cannot, and the chair gets left behind.
Accessory dimensions matter more than you think. Carry-on and personal-item size limits apply to your accessories too. A thick memory foam cushion, a folding tote, or a clamp-on attachment can push you over the sizer even when the chair itself is gate-checked. Measure your packed accessories against your carrier's published carry-on dimensions before you fly, and keep the bulkiest items in the bag you plan to gate-check rather than the one you keep at your seat.
Documentation is the accessory that matters most here. Label every detachable part of your chair with your name and contact information before you reach the checkpoint. Detached parts get separated from the chair during screening, and unlabeled cushions, bags, and handrim covers are the items most likely to go missing.
A few practical habits that make the security line faster:
- Remove loose accessories before you reach the belt, not during screening
- Keep a printed list of your chair's components and battery specs in your carry-on
- Request the private screening area if you use a power chair or have dexterity limitations
- Confirm with your airline what counts as a "mobility aid" versus checked baggage before departure
- Verify your carry-on accessory dimensions against the airline's published limits
How to Pack a Wheelchair for Flying
Knowing how to pack a wheelchair for flying comes down to one principle: remove what comes off, protect what stays on, and document everything in between. Manual wheelchairs generally fold or disassemble for gate-check, while power chairs need battery documentation and often a separate handling request at check-in.
The single biggest mistake is treating your chair like luggage instead of medical equipment. Durable medical equipment gets different handling, but only if you flag it correctly at the counter. Ask for a gate-check tag rather than a standard baggage tag, and confirm whether your chair will be returned at the gate or at baggage claim on arrival.
For power chairs, the lithium battery is the sticking point. Airlines require advance notice for lithium battery transport, and the rules vary by carrier. Call ahead, get the confirmation in writing, and keep it with your travel documents.
Wheelchair Seat Cushions for Long Travel
Wheelchair seat cushions for long travel are the highest-impact upgrade you can make, because sitting in an airport for six hours is a different physical demand than sitting at home. A memory foam cushion with a breathable mesh cover distributes pressure more evenly and reduces heat buildup during extended sitting.
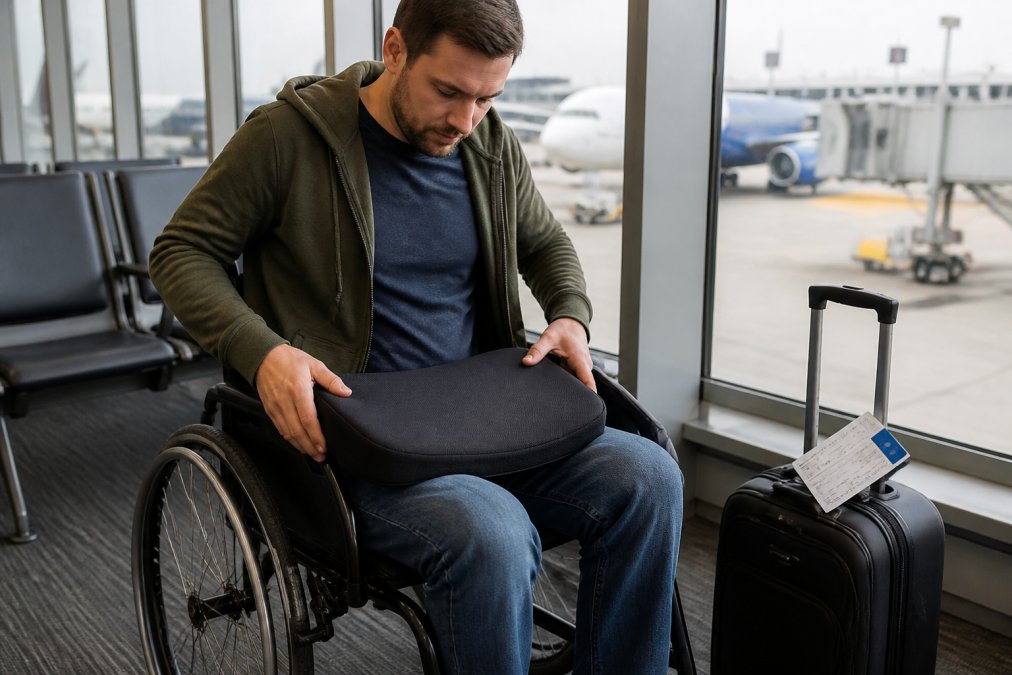
The Journey Must Haves Ergonomic Memory Foam Seat Cushion is built for exactly this scenario. The slow-rebound memory foam supports posture through long waits without flattening out, and the mesh cover keeps air moving so you're not dealing with heat and moisture by hour three. It measures 46 by 43 by 12 centimeters and comes in six color options, so it works with most standard chair widths.
Where it falls short: memory foam adds bulk, and if your chair is already tight on space, a thick cushion can push your knees higher than you'd like. Pair it with a cushion cover that wipes clean, since airport floors and gate areas aren't gentle on fabric.
Storage, Comfort, and Mobility Upgrades That Matter
Storage and comfort upgrades earn their place when they solve a specific problem, not when they simply add features to your chair. The best travel accessory is the one you forget you're carrying until you need it.
For comfort on the move, footwear matters more than most people expect. Swollen feet during travel are common, and tight shoes turn a manageable day into a painful one. The Journey Must Haves Ellese & Co. Broadfit Diabetic Footwear uses a zero-drop build with a memory foam insole that absorbs impact, which helps on long walks through terminals. For anyone dealing with plantar fasciitis or wide feet, the arch support walking sneakers from the same collection add a wide toe box and a 3cm arch support insole.
For bathroom stops, which are often the hardest part of accessible travel, the Journey Must Haves Suction Cup Non-Slip Bathroom Handrail installs without drilling and supports up to 70 kilograms. It's a practical addition to any hotel stay where grab bars are missing or poorly placed.
| Accessory Category | Problem It Solves | Install Difficulty | Best For |
|---|---|---|---|
| Memory foam seat cushion | Pressure and heat during long sitting | None, place and go | Long flights and gate waits |
| Suction cup handrail | Missing grab bars in hotel bathrooms | Low, no tools | Overnight stays and airport restrooms |
| Wide-width footwear | Swollen feet and arch pain | None | Walking-heavy travel days |
| Removable wheel or tote solutions | Chair transport and storage | Low to moderate | Airport navigation |
Installation Difficulty and Universal vs. Proprietary Compatibility
Installation difficulty and universal versus proprietary compatibility determine whether an accessory actually travels with you or stays in a closet. The rule of thumb: if it needs a tool you wouldn't pack, it's not a travel accessory. But "tool-free" is not a single category, it is a spectrum, and knowing where an accessory falls on it before you buy is the difference between a smooth trip and a mid-airport scramble.

A simple installation rating you can apply to any accessory:
- Tool-free (0 tools): Cushions, suction-mounted rails, strap-on totes, and hook-and-loop attachments. Install in under a minute, no dexterity demands beyond basic grip. Best for travelers with limited hand strength.
- Light-tool (1-2 tools): Clamp-on cup holders, some wheel locks, and bolt-on bag mounts. Usually a hex key or Phillips head; pack the tool in your carry-on or the accessory becomes dead weight.
- Professional install: Custom quick-release hardware, powered add-ons, and anything that modifies the frame. Not a travel accessory, leave it on the chair at home.
Universal vs. proprietary: how to check before you buy. Universal-fit items, like cushions and suction-mounted rails, work across most chair types and need no modification. Proprietary accessories, like custom clamp-on attachments or branded quick-release hardware, only fit the chair they were designed for, which limits you if you rent or borrow a chair at your destination.
The compatibility check most buyers skip is frame type. Folding chairs and rigid-frame chairs accept different mounting points, and an accessory that clamps cleanly to one can be unstable on the other. Before ordering, confirm three things: your frame type (folding or rigid), your tube diameter at the intended mounting point, and whether the accessory uses a clamp, a strap, or a bolt. If the listing does not state all three, treat it as proprietary until proven otherwise.
The weight-to-durability ratio is the other calculation most buyers skip. A lightweight accessory that cracks after one trip costs more than a slightly heavier one that lasts years. Check the load capacity and material before you buy, and lean toward reinforced construction over the lightest option available. For travel specifically, the sweet spot is usually an accessory that adds minimal weight but uses metal hardware at the stress points rather than all-plastic fittings.
Conclusion
Traveling with a wheelchair asks you to plan for problems before they happen, and the right accessories make that planning feel less like a burden. Journey Must Haves curates gear built for exactly this: the Ergonomic Memory Foam Seat Cushion for long sitting, the Suction Cup Non-Slip Bathroom Handrail for unfamiliar bathrooms, and wide-width footwear with arch support for swollen feet on walking-heavy days. Each piece is chosen to keep you moving forward without adding weight you'll regret. Explore Our Collections and pack for the trip you actually want to take.

Frequently Asked Questions
What are the most essential wheelchair accessories for air travel?
The essentials are a TSA-compliant seat cushion, a durable travel bag for your chair, and a compact storage tote. A memory foam cushion like the Ergonomic Memory Foam Seat Cushion ($64.99) helps with long waits and flights. Also bring a small maintenance kit and safety reflectors. Always check your airline's specific rules before flying, as policies vary.
How do I protect my wheelchair from damage during airline travel?
Use a padded travel bag and remove any quick-release parts like armrests or footrests before gate-checking. Take photos of your chair before the flight. Label every removable component. Ask the gate agent to tag your chair and confirm it will be returned at the jet bridge.
Are there specific wheelchair bags designed for travel?
A tote bag that attaches to your chair's frame is also useful for carrying personal items.
What accessories help with wheelchair comfort on long trips?
A memory foam seat cushion reduces pressure on long sits.